Nour's Bodacious Blog

Your one stop shop for everything Nour

Assignment 4: Rich Multimedia Lesson – Group E

Overview

A resume is an essential component of any job application. Many university students strive to build attractive, easy-to-read resumes that contain all the information an employer could be looking for. Having your resume be a pdf or word file is very common, but many applicants opt for web-based resumes instead as they show more initiative for creation and are very appealing to the eye. There are many services that can host resume websites, such as Wix.com or WordPress, but the most prominent and most versatile is AstroJS.

Astro, or Astro.js, is a web framework, meaning it is a platform that allows you to build websites using mainly JavaScript code. AstroJS focuses on being user-friendly and lightweight, while staying robust and efficient. It has a variety of User-Interface libraries integrated into it, making it very appealing for seasoned coders who don’t wish to lose out on the libraries and features they’re used to. AstroJS is also very accessible with many online tutorials detailing exactly what you need to do to learn and how to improve, and there is a very well organized documentation section on the AstroJS website.

In this lesson, we plan on teaching you how to create a resume website using AstroJS.

What are the tools we need, and why we use these tools

Since AstroJS prides itself on its usability, you don’t need many tools to get started, but there are a few that are mandatory before you can create your own website. You will need the following tools:

  • Node.js Version 18.14.1 or higher
  • A text editor (It is recommended to use Visual Studio Code and install the official Astro extension)
  • A terminal (This one comes pre-installed with all operating systems)
  • A Github account
  • A Vercel account

Now, you might be asking yourself why we would need all these tools? The answer is as follows:

  • Node.js: As stated above, AstroJS uses your JavaScript code to create your websites, but it requires an environment to run the JavaScript code in. This environment, which is a setup of parameters and fields that allows your device and text editor to understand the code being written in the environment, is Node.js. Node.js is an open-source JavaScript environment that allows AstroJS to function, so it is necessary for execution of JavaScript code and for AstroJS as a whole
  • Text Editor: If you’ve ever written code before, you know that a good text editor can make or break a project. Text editors are software that allows users to write their data, code in our case, in an organized, structured manner. Coding text editors are made for writing code and, as such, offer additional features and extensions that make writing the code far easier. This will be what you use to write your JavaScript code for your website
  • Terminal: The terminal is a command-line interface, or CLI for short, meaning that it is an interface that accepts a specific set of commands then executes these commands for the user. It can be used for a variety of reasons, but the main reason we’re using it is because much of the setup process for AstroJS, as well as various processes within the platform like creating a new file, are done using the terminal, so learning these commands and how to use them will be necessary
  • Github: Github is a repository website, meaning that it can store your data in massive folders called repositories. It is mainly used for storing code files and projects, with each repository acting as a vault for a project. Github will be the website we will use to store our website’s data as a repository
  • Vercel: Vercel is a web-hosting platform that allows its users to quickly and efficiently upload their websites. It acts as a cloud service for websites, and uses the website code you upload to it. It is also capable of using Github repositories as the source of your website, and it works with AstroJS, so we will be using it to host our website

While this may seem overwhelming, the steps to install them are very easy.

Setup the tools needed

1. Install Node.js:

2. Install and setup a Text Editor:

3. Setup a Terminal:

  • Every machine comes with a terminal or command prompt pre installed like Mac and Linux usually have it with the name “Terminal” and Windows have it with “Command Prompt”
  • It could give some issues with permissions as the terminal can be accessed as a user and as an administrator which are two different types of roles or any specific name for various operating systems, in that case it is always advisable to open your Command Prompt or Terminal by right clicking them and opening them “as an Administrator”
  • To test, you can run commands like ls which will help you list all the content in the current directory or folder the terminal or command prompt opened in.

4. Create a Github Account:

  • Visit the Github website: https://github.com/ 
  • Create a new account if you don’t have one already.
  • Follow the instructions to complete the account creation process.
  • Optionally, set up SSH keys for secure authentication with Github.
  • There is also an option to install github desktop which can make it easier to interact with git with the help of a visual user interface.
  • You could follow this elaborate step by step walkthrough – How to Install and Configure Git and GitHub on Mac / MacOS (2024)

5. Create a Vercel Account:

  • Go to the Vercel website: https://vercel.com/ 
  • Sign up for a new account using your preferred method (e.g., email, Github, GitLab, etc.).
  • Follow the instructions to complete the account setup process. You can also follow the installation documentation here for more information and guidance ​​https://vercel.com/docs/cli 

How to save a resume template and host it on Vercel

We have created a screencast showcasing the steps for saving your resume template and hosting it on Vercel shown below:

We have also listed the steps below:

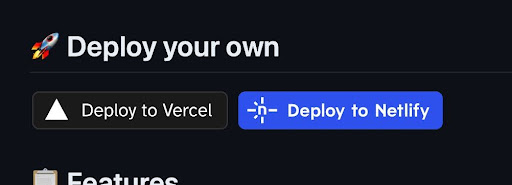
This will automatically take a copy of this resume template, and Vercel will upload it and host it as a website for free.

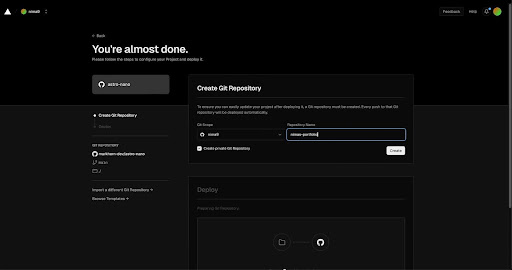
We are almost done hosting this repo on Vercel, you’ll see on the site that opened up the title “You’re almost done.”. Vercel took a copy of that repo, and now is making a copy for you and saving that repository into your github account repository, but it needs a name for the repository. Let’s name it “nimas-portfolio”. Please feel free to use your name instead of mine:

  • Now click “Create”! And just like that, Vercel added the “Astro-nano” repo to our github repositories, and then started to build, and host our repository and gave it a domain that we can visit. You should see a “Congratulations’s page” and a screenshot preview of our new website. If you click the screenshot, it will take you to the live website that Vercel is hosting for us:

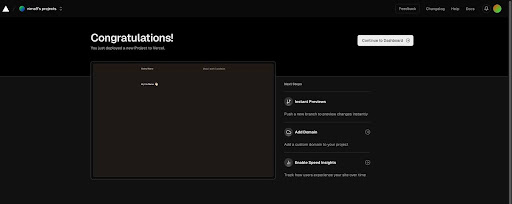
In this case, Vercel gave me the domain name “https://nimas-portfolio.vercel.app/”.

How to customize the resume template

So now that we have our site uploaded, how do we customize it and make it our own? Well we can make changes to our website on VSCode. But before we do that, we have to link our github repository to vscode, so then any change we make on VSCode, we can “push” (or upload) to github (which then Vercel will auto-magically rebuild and upload the website with the new change within seconds).

  1. First, open up VSCode
  2. Let’s clone our newly made github repo (mine is named `nimas-portfolio`). When you open up vscode, click the Explorer tab on the left hand side (looks like this icon
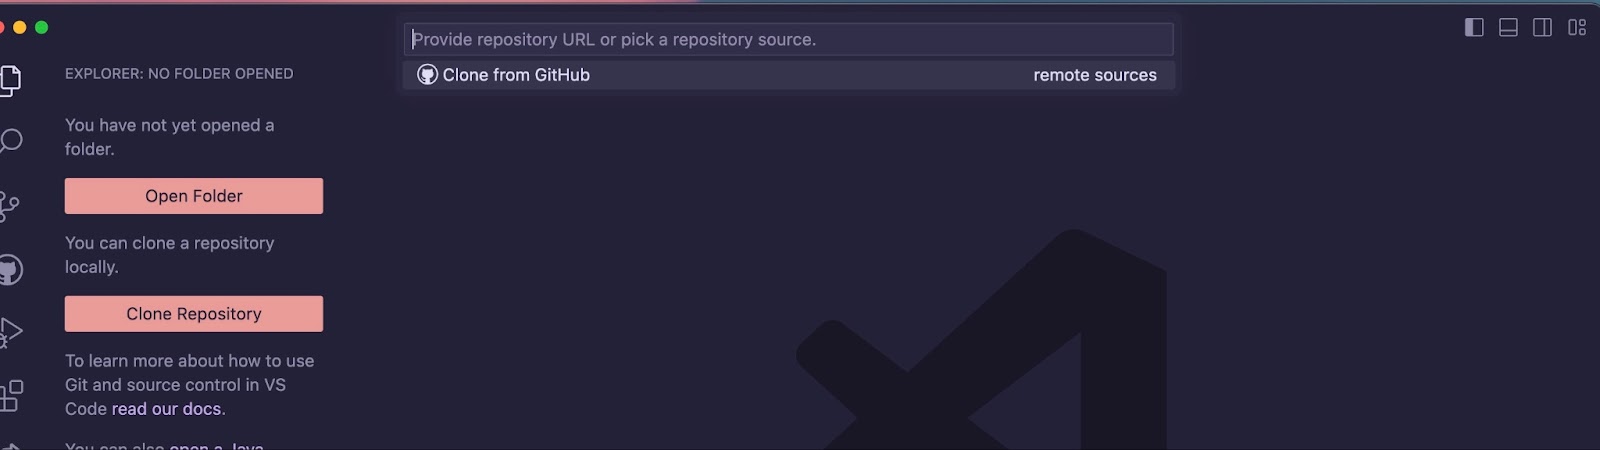
  3. And click “Clone Repository” (this could have also been done in the Source Control tab). You may be asked to sign it to your github account (so you can see what repositories are stored on your github account), so please go through that first.
  4. After that, you can click the “Clone Repository” button, and a small dropdown will appear on the top middle of your screen.
  5. Please click the “Copy from GitHub” button (since this is the simplest way). 
  6. A list of your repositories (which is probably only one, the portfolio one you copied) will show. Please click the portfolio repo you just made (in my case, that is “nimas-portfolio”).
  7. Now a Finder (or Windows Explorer) window will show up. We want to make a folder to store the repository folder locally on our PC. Since these are just local copies (and the main copy is stored on GitHub), there is no need to backup this folder. I like to store my repos in a folder called “Developer” under my “Nima” folder.
  8. This might look different depending if you’re on Mac, Linux, or Windows (I’m on Mac). 
  9. Please create the folder and click the “Select as Repository Destination” button:
  10. VSCode will now “do its thing” and copy the repo. You may see this pop-up:
  11. Just click “open”. And now your “Explorer” tab will be filled with random files and folders! like this:
  12. Congrats! You copied your github repo to VSCode. Now this will allow you to make changes to the website, and then update the changes on github.
  13. How do you change content/text on the site? I will show you a quick way!
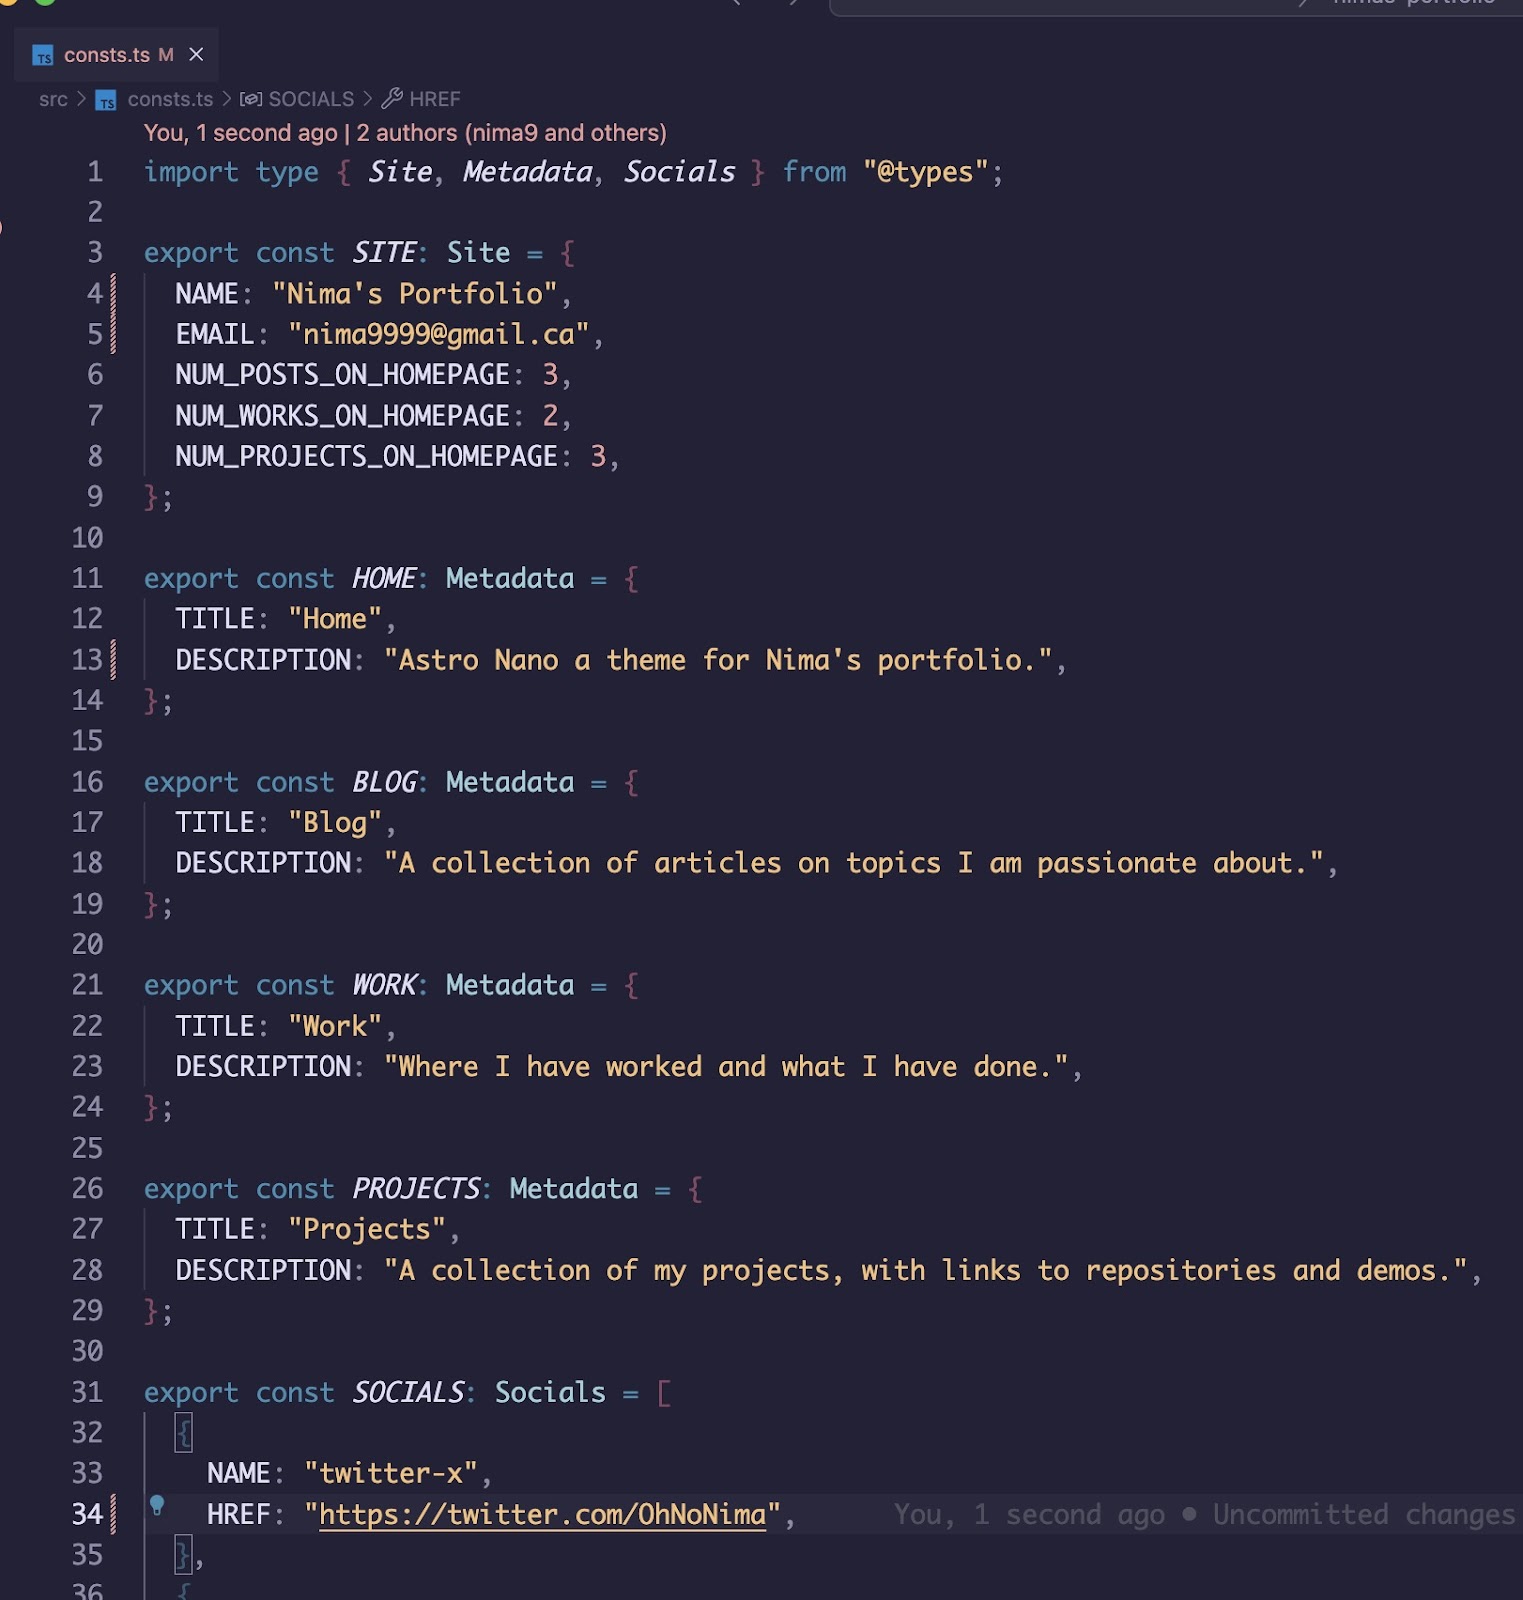
  14. First, for this specific repo that this person made, he made some nice, easy to change global constants; meaning these are values that are used all over the repo, which we can just change in one place, and will take effect all over the repo. Let’s update these values (such as the name, and email). Open the “src” folder, and click the “consts.ts” file.
  15. Anything to the right of a colon “:” is a value. And the name of where that value is stored is to the left of the colon called “variable”.
  16. For example, we have:
  17. The comma tells the code that “there are more variables below me”. Let’s change some of these values to better customize our site. Here is an example of some changes I made:
  18. These changes are kinda important, we may not see these changes on the site, but these values are more helpful for SEO stuff  (and for when you link your site, proper information shows as a hyperlink).
  19. Okay nima, now how do I change the info on the front page!  Okay, let’s get into it: The important part of most website repos will be in the “src” folder. Now this is not a tutorial of how to understand how this repo works, that is a full on “AstroJS” tutorial. We just want to make some basic changes. The best way is to just search! For example, let’s head on back to vercel.com
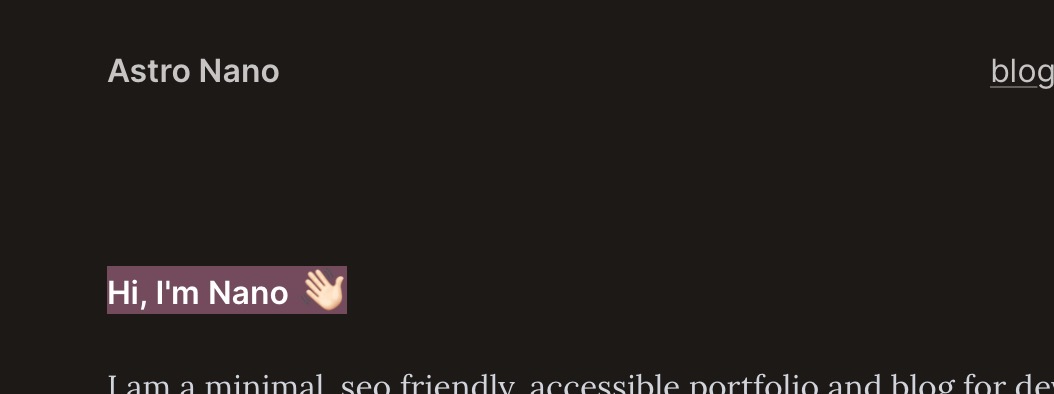
  20. You should see the repo you copied, click it! Then, you should see a link under “Domains”, click the link. This is your live website right now.
  21. Let’s say I want to change the text of “Hi, I’m Nano đŸ‘‹đŸ»â€. So the best way is to copy the text “Hi, I’m Nano”
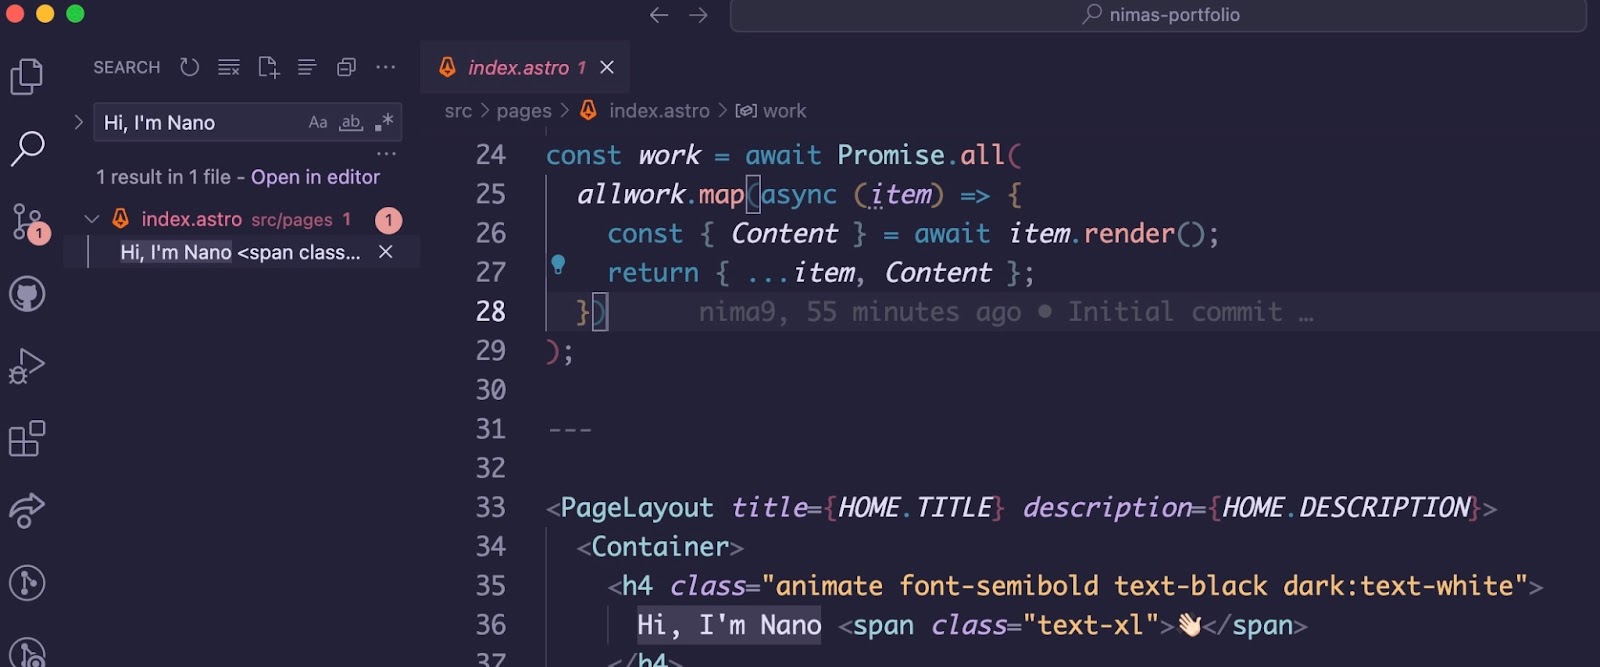
  22. Go to vscode, and click the search button on the left hand side 
  23. And past “Hi, I’m Nano”.
  24. You’ll see that vscode found a match under “index.astro” (index.astro is the first and main file astrojs looks at).
  25. Click on the found result and the file (with the found matching text) should be highlighted!
  26. We can now just easily edit that text (in software, we call it a string) to whatever we want. Don’t worry about all that other weird code, we don’t need to touch it. I’m going to change the text to “Howdy y’all, it’s your boi Nima”
  27. Save the file (cmd + s or ctrl + s), and now let’s tell github about this new change by pushing the new change in git.
  28. You’ll see that there is a ‘2’ on this icon: That means two files have been changed. Let’s upload (or push) these changes to github. Click on the “Source Control” icon
  29. You’ll see the two changes are “consts.ts” and “index.astro”. This is great, because those are the exact files we edited. Let’s “Commit” and “push”. Click here: 
  30. So that all changes (the two files) can be added to the commit. Add a message very briefly describing what this change is about, and click the “✓ Commit” button.
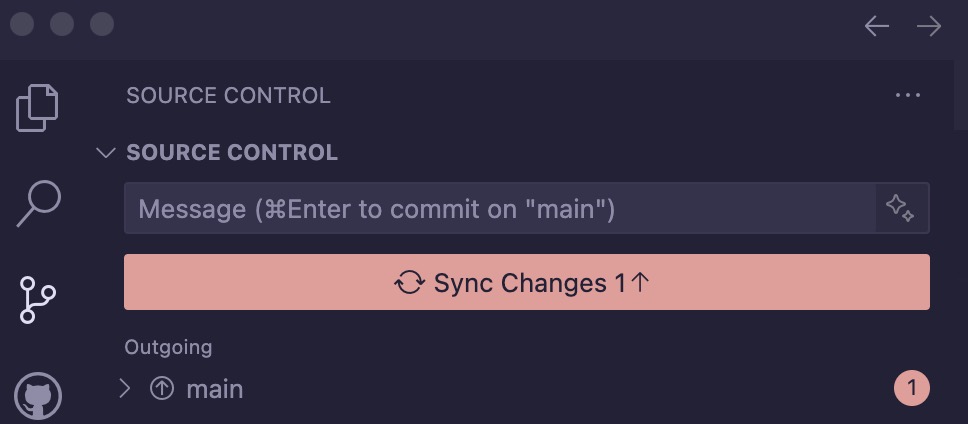
  31. Nice, we committed the change, but now we have to sync the change from our computer to GitHubs servers.
  32. Click on the “Sync Changes” button to upload the changes. And now we are done! Wait 30 seconds and refresh your Vercel website to see the change! There ya go! You’re done!

This is just an intro tutorial. To learn more, I highly recommend just learning some basic HTML, Javascript, and CSS (my favorite resource is a site called “SoloLearn”).

We’ve also created an H5P quiz to help you remember important information about customizing your resume! The quiz is shown below:

Reflection

A discussion of how each member has contributed to the project

  • Nour: Provided the learners with an introduction to the software by explaining the overview, importance and functionality of AstroJS for creating web-based resumes. This foundational knowledge helps users get familiar with the software and serves as a stepping stones. Also, wrote out the necessary tools section, created the H5P quiz, and helped create the lesson plan template.
  • Saksham: Created screen-cast and helped educate our learners on setting up and using the software. He did this by offering step-by-step instructions on Node.js, Visual Studio Code, setting up a terminal, GitHub, and Vercel accounts. Saksham’s contribution is critical in preparing learners for the hands-on development process.
  • Nima: Helped the learners to understand how to use the software after initial setup. He explained the learners customize the resume template, illustrating how to clone the GitHub repository to VSCode, make changes, and push updates. These helped users personalize and use the software to its full potential.
  • Shradha – Helped in writing the reflections and connecting the content created to the lessons and principals learner. Helped create the lesson plan using the template given and answer the reflective portion of the assignment.

A lesson plan using the template introduced in Module 4

Identify which media you created and with which tools? 

The media tools we used are 
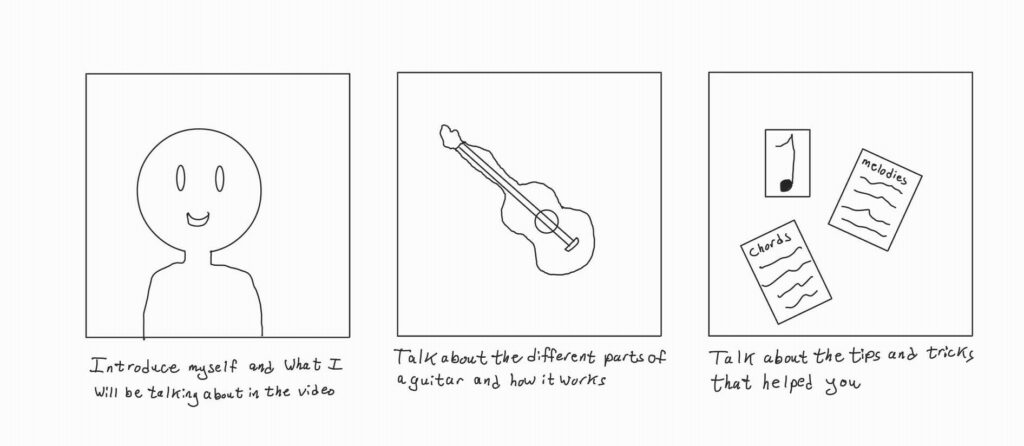
1.Screencast

2.HP5 quizzes 

3.Photos

Identify the principles, theories and techniques that we studied this term that you have followed in your lesson? – Shradha 

For this principal we used theories learned in our course to make out learning accessible and engaging

Mayer’s Personalization Principle: Research shows that people learn better when information is presented using conversational language, rather than more formal speech. This blog and screencast was written in a conversational tone. This helps enhance learning.

Mayers Segmenting Principle: This principle states that learning is maximized multimedia message is presented in small blocks or segments rather than as a continuous unit. Our lesson is divided into multiple blocks like introduction, installing, personalization and so forth.

Practical Design Choice – 

 To ensure this requirement is met we have provided external resources and references, such as links for each setup step. This helps the learners to explore topics in-depth at their own pace, further reducing cognitive load.

  • The content is also simplified and segregated into clear, concise steps to make the blog easy to navigate and follow. This helps learners to follow the lesson plan without cognitive overload.
  • We have also added multiple means of representation by presenting information in different formats, including text, videos, and images. This helps to diversify the way we present information and help learners of all abilities and preferences

Active and Passive Learning 

Passive Learning: We have incorporated both active and passive learning content to help learners access information at a later time and also learn in active memory

The instructional videos and written guides are the passive component and the videos and HP5 quizzes are the interactive active components.Learners can also engage in active learning through hands-on activities, such as setting up their development environment, cloning a GitHub repository, and customizing a resume template.

Dual Coding Theory

  • We have used both text and visual aids to cater to different learning styles. For example, integrating screenshots of the AstroJS templates or video links for installations provides a dual coding approach. Allowing both Verbal and Visual Channels help to enhance learning

References:

  1. Abstract programmer. (2022, April 14). NodeJS installation on Ubuntu 22.04 [Video]. YouTube. https://www.youtube.com/watch?v=NS3aTgKztis 
  2. Tech Time. (2022, January 22). How to install Nodejs on Mac [Any version & Easy method] [Video]. YouTube. https://www.youtube.com/watch?v=SwUKKCS3r3c 
  3. ProgrammingKnowledge. (2023, March 19). How to install Node.Js on Window 11 [Video]. YouTube. https://www.youtube.com/watch?v=06X51c6WHsQ 
  4. vCloudBitsBytes. (2023, March 25). How to install Visual Studio Code on Mac (M1/M2 chip) – step by step guide [Video]. YouTube. https://www.youtube.com/watch?v=79JE4Pg7BAE
  5. ProgrammingKnowledge. (2024, January 25). How to install and configure Git and GitHub on Mac / MacOS (2024) [Video]. YouTube. https://www.youtube.com/watch?v=p0Js7IF17yI 

Assignment 3 Comments

Comments on @nima’s posts

Module 3 Comment

Module 4 Comment

Module 5 Comment

Comments on @saksham’s posts

Module 3 Comment

Module 4 Comment

Module 5 Comment

Comments on @shradhananda’s posts

Module 1 Link

Unfortunately, my comment is still awaiting moderator approval, but I have attached it below

Module 3 Link

Again, my comment is still awaiting moderator approval, but I have attached it below

Aside from Modules 1 and 3, @shradhananda did not have any other posts on their blog, so I was unable to comment on their Module 2, 4, and 5 posts as they did not exists. I will update this if they do upload their posts.

Module 5 Reflection

Introduction

In Module 5 of EDCI 337, titled “Generative AI and Evaluating Content and Tools for Learning”, we discussed the idea of selecting appropriate media, multimedia, and technology for your learning environment, as well as the idea of using generative AI tools to foster creativity and assist in creating learning material.

Topics

We discussed the idea of how generative AI can be used effectively, both by students and teachers. Generative AI can be detrimental to student learning if abused because it prevents working memory from fully absorbing the learning material. However, if generative AI is utilized correctly, it allows students, teachers, writers, artists, and many more people to quickly create drafts and generate ideas that they can then expand upon. It allows students to understand difficult concepts and quicken their research process, and it gives teachers a virtual assistant that they can have help them with their teaching plans.

However, AI also comes with a lot of moral ambiguity. Due to the fact that many AI tools are trained on datasets that may contain copyrighted material, and the fact that there no current laws to regulate the use of AI, using AI tools carries the possibility of infringing upon someone else’s intellectual property. That, coupled with the fact that most things created using AI tools don’t actually belong to the user who created them, makes the use of AI tools especially dubious at times.

As such, teachers have to be able to pick media, multimedia, and technology that suits their needs and the needs of their students. That is why models such as TPACK and SECTIONS exist. TPACK stands for Technological, Pedagogical, and Content Knowledge, and it is a model that allows you to consider all facets of both yourself and the new technology you wish to include in your class before you include it. You analyze your Technological Knowledge, your knowledge of the technology itself, your Pedagogical Knowledge, your knowledge of teaching techniques and methodologies, and Content Knowledge, your knowledge of the learning material. By examining all these aspects, you can decide whether the new technology or medium you wish to include will be beneficial to your class environment. SECTIONS does something similar by allowing you to analyze many different aspects of including a new technology. These aspects include:

  • Students
  • Ease of use
  • Costs
  • Teaching functions
  • Interaction
  • Organisational issues
  • Networking
  • Security and privacy

By considering all these aspects, you can make a well-informed decision about the technologies you wish to include in your classroom.

Discussion

With the boom that AI tools such as ChatGPT have had, it is not surprising to me that more and more people from a variety of fields are starting to use these tools to make their work easier. I am also not surprised by the fact that people are using these tools as simulators for work and for games. Since I want to get into video game design, I was deeply intrigued by the Roleplaying Game prompts. I decided to try the prompt that allowed me to simulate the TV show “Pawn Stars”, as that is a show I used to watch when I was a kid. I found that the outputs were quite realistic and matched the tone and flow of the show quite well. It allowed me to give it a random item, like a Pokemon card, and ChatGPT was able to recognize what that item was and what its actual value was. I will that, as impressed as I was with this, the prompt did make the game feel a little restricting. The show had a variety of avenues to go through with a deal, so having the game constantly take me down the same flow felt restricting in a way, but that is to be expected from the AI tool seeing as the prompt can never be all-encompassing otherwise the AI tool won’t understand.

Fig. 1. “You are now GameGPT, a virtual host facilitating a game. Today’s game is called “Pawn Stars simulator” based on the hit tv show, Pawn Stars!” continued with the rest of the prompt from https://github.com/AdmTal/chat-gpt-games/blob/main/games/pawn-stars-simulator.md. ChatGPT, version 3.5, OpenAI, 30 Mar. 2024, chat.openai.com/chat.

However, as limited as it was, it was still quite impressive just how creative you could get with the prompts, and I was enamored by the different ways that people have been using these tools. I believe that these tools can be made to include more and more people in a productive learning environment. It can be made to include people who suffer from mental or physical disabilities, providing them with a tool that can make communication, self-expression, and team work much easier. However, I believe that it currently excludes people whose first language is not English or who do not have steady access to the internet. If these AI tools are trained on more languages and given the opportunity to have people download specific aspects of the tool so they can use it offline, I feel like it would be more inclusive.

Generative AI Tool

For this blog post, I decided to use Stable Diffusion. It is a tool that I have never explored before, and I have always been interested in AI art and its capabilities. The image I generated is found below:

Fig. 2. “Anubis towering over the pyramids” prompt, Stable Diffusion, version Stable Diffusion XL, Black Technology LTD., 30 Mar. 2024, stablediffusionweb.com/.

I decided to use a prompt that spoke to me, so I gave it “Anubis towering over the pyramids” in a Cyperpunk style. I think the photo came out really cool. There were other prompts that I used that did not come out super great, mainly because Stable Diffusion failed to understand what I wanted, and the fact that they give you only 10 images a day is a bit rough, but I am happy with the results.

SECTIONS Analysis

I have decided to do a SECTIONS analysis on Twine from the point of view of a writing teacher.

Students

I believe that students can make great use of this service as it can provide them with a way to layer their stories and create rough drafts of their story progression. The only requirement would be high-speed internet, but most of the students have that and it can also be provided by the university

Ease of use

Twine is not very intuitive and can be very difficult to use at points. I found it particularly difficult to use when attempting to stylize your story, so it may prove difficult for students to get creative

Costs

Twine is a free tool that doesn’t even require you to make an account, so it has virtually no cost

Teaching functions

I feel like Twine facilitates teaching about story telling and the effects of using stories to convey meaning or emotions, so it coincides well with the learning outcomes of a writing course

Interaction

Twine does not allow for much co-operation between students or teachers, but I can create an assignment where students have to work in pairs or groups to create a story

Organisational issues

Seeing as Twine can be accessed from any laptop or computer, and the stories you create can be exported to be accessed on different computers, I believe the organizational aspect can be very easily handled, especially if the university supports not deleting web browser cookies for users to allow students who use university computers to keep working from where they left off

Networking

This tool can be a good segway to introduce some expert story tellers from the field, especially if they have used Twine before, to describe their experiences with writing stories

Security and privacy

Twine is secure as it only uses your browser’s cookies to save your stories and does not need to access your own computer to save anything, but that also creates a privacy risk for students using university machines if the university does not support different users having separate desktops and separate browser cookies as that may cause one student to be able to see another student’s stories, which is a privacy risk

All in all, through this analysis, I believe that Twine will be an easy to incorporate tool with minor problems that can easily be fixed

Conclusion

Generative AI tools are very interesting to me as a Computer Science student, so getting the opportunity to explore them has been a very eye opening experience. I am, once again, very glad that this course gives me the opportunity to explore a variety of tools in every module. That’s it for this blog post. Have great time, stay safe, and I’ll see you in the next one.

Module 4 Reflection

Introduction

In Module 4 of EDCI 337, titled “Principles of Learning Design and Active Learning”, we discussed the idea of creating learning material that is engaging and memorable by using various principles that allow students to see their progress for themselves.

Topics

We discussed the principles of learning design, mainly the ones presented by M. David Merrill. Merrill discussed how many learning materials nowadays are what he referred to as shovel ware, meaning that they just shovel course material online without proper structure, deterring students from learning.

Merrill then suggested ways to make learning material more engaging for students. He titled his principles the Principles of Instruction, where he stated that students learn better if:

  • Learners are engaged in solving real-world problems
  • Relevant previous experience is activated
  • The instruction demonstrates what is to be learned
  • Learners are required to use their new knowledge or skills to solve problems
  • Learners are encouraged to integrate the new knowledge or skill into their everyday life

If all these principles are applied to the learning material being created, it produces content that is more easily digestible and lingers more with students than regular learning material.

We also discussed ways to create your learning material, such as the Scaffolding technique and the Active Learning method. The Scaffolding technique relies on building a solid base of knowledge for students that is then added onto as their knowledge of the material expands and as the instructor provides less and less assistance so that the students can begin exploring on their own. Active Learning is part of the Scaffolding technique in that it focuses on allowing students to engage with the material themselves through performing tasks and procedures that relate to their learning, or by discussing what they just saw/performed in pairs or groups. We also discussed Backward Design where, instead of starting out by creating activities for teaching, you start by identifying your goals and learning outcomes, then how you will assess these outcomes, then plan your teaching activities while keeping all the things you’ve created in mind.

Discussion

I found the principles discussed by Merrill to be really interesting. A lot of times we take creating teaching materials for granted, but it is because we do that that a lot of learning material found online is ineffective or forgettable. I particularly enjoyed mixing video games with the learning material as video games are a passion of mine. I have experienced similar video-game-like methods of teaching when I was in highschool, like teachers using Kahoot! I found that if they followed Mayer’s Coherence principle, sticking to content that pertained to the learning material, and Merrill’s principles of activating relevant experience or allowing learners to use their acquired knowledge in new situations, they were highly enjoyable and effective.

I also found the techniques utilized to create new learning material very engaging, especially the Scaffolding technique, since it allows for a natural progression of knowledge for students, presenting them with more complex problems as they build their scaffolding of knowledge. I have personally experienced the Scaffolding technique with my grade 12 economics teacher. He began by teaching us basic principles of economics such as key words and concepts. Then, he introduced slightly more difficult concepts and assisted us in making links between them and what we had already learned. Then he introduced more difficult problems and began to slowly step back, allowing us to work in pairs or groups to discuss and analyze how these new problems can be solved using the knowledge we already possess. I found this to be highly effective and feel as though I had learned a lot from his class.

Lesson Planning Template

Backwards design sounds so reasonable and logical to me now, but before I was introduced to it, I don’t think I would have utilized something like that. You would think that, as an instructor, you already know the learning outcomes and don’t need to restate them or plan out what your students are going to learn because you already know, but this is highly ineffective. I’m glad I got to use this template, even if it was for a simple lesson like the one I chose, because it allowed me to further understand just how important Backwards design really is.

H5P Interactive Video

For the longest time, I had wondered how instructors were able to create interactive videos and embed them so seamlessly into their websites or course packages. Now, I am able to create my own! It feels incredibly rewarding to be able to use this platform and create more engaging material, especially when creating said material was so easy! I decided to expand upon the video I had created back in Module 1 so whoever watches it can engage with it in a more active manner.

Conclusion

This module has been eye-opening to say the least. Many of the concepts, principles, and methodologies introduced in this module seem intrinsic or simple, but the fact that a lot of them are still not applied in many schools and universities today is baffling. I am glad I got to learn about these things, and I will definitely be applying them in my future work. I hope you enjoyed reading my blog post. Have a wonderful morning, afternoon, evening, or night, and I will see you in the next one!

Assignment 2 Blog Post

Here is the link to my assignment 2 video: https://youtu.be/oyH6NRDOS0s

Script

“Hello Everyone! My name is Noureldin Kamel, and today I will be talking to you about guitars!

What I will focus on today is the different components of a guitar, how a guitar makes noise, and simple ways to play a guitar.

Now, there are many components to a guitar, and you need to be able to differentiate between them so you can understand what people are referring to when they talk about guitars.

Starting from the bottom we have the bridge base, the piece of wood or plastic at the very end of the strings. On top of the bridge base is the bridge saddle which is this, usually white, piece of plastic that the strings lay on at the start of the string, it also lifts the string higher up off the base. On the other end, the white piece at the very top is called a nut, which serves a similar purpose to the saddle. Then, there are the pegs, which are the metal bits connected to the strings that allow you to tighten or loosen the strings to correct their sound, an activity known as tuning. Then we have the neck, also known as the fret board, which has all of these metal bars alongside it known as frets. The space between a fret is also known as a fret. There is the rosette, which is the area around the sound hole, and of course, the body of the guitar.

Now that we know all the parts of a guitar, how does a guitar make noise and what is an easy way to start learning?

Guitar makes noise by utilizing the tension of these strings, which depending on the type of the guitar can be metal or nylon. By plucking a string, you cause it to vibrate at a particular frequency. The noise created is then amplified and changed by the structure of your guitar’s body, so different shapes of guitar will create different sounds. I mentioned tuning earlier, and that is making sure every string sounds the way it should so that when you play it, it doesn’t burn your ears.

Now I am learning myself, so the best tip I have seen to start learning is to learn about finger warm-ups like this which gets blood flowing to the fingers and to pick songs that you like that are simple and start learning them. A simple example is simple melodies where you can just hold down one fret and pluck one string or simple songs where you hold down chords like this.

And that’s about it honestly, I don’t wanna cram too much into here cause guitar is a broad and interesting subject that I encourage you to explore. I would be lying if I said it wasn’t hard, but it’s also very rewarding.

Well, that’s it for this video. Thank you for watching, I hope you enjoyed it, and I hope you have a wonderful morning, afternoon, or evening! Buh-bye!”

Storyboard

Reflection

What is the learning purpose of your video?

The learning purpose of my video is to introduce people to guitar and try and take some simple concepts that are necessary for any guitar player and explain them quickly and efficiently


Why is video a good medium for this learning purpose?

Video is a very good medium because discussing guitar is very different from watching somebody play it. If you watch a tutorial on how to play a guitar, you will learn much faster than reading about it because it is a physical activity, so I think video suits this very well.


Which of the principles we’ve covered this term (e.g., Mayer/Universal Design for Learning/Cognitive Load Theory) did you incorporate into your design and why?

I focused mainly on signaling and modality mainly because I believe that they are some of the most important principles when it comes to videos. If you can’t show where people should be looking, they will get lost in your video, and if you don’t cut up your video into sections, they will get overwhelmed.


What was challenging about capturing your own video?

The lighting and audio capturing were definitely very challenging. I had not done video graphing myself before, so it was definitely hard to try and nail these things down.


What did you find easiest?

Discussing the actual topic was definitely easy because I am learning about it right now and I am very passionate about it.


How would you approach capturing video differently next time?

Use a better camera and invest in some editing software definitely. I feel like both those things will enhance the video quality tremendously.

Conclusion

Thank you for watching my video and reading my blog post. I hope you enjoyed them both, and see you in the next blog post!

Module 3 Reflection

Introduction

In Module 3 of EDCI 337, titled “Storytelling and Creating Video”, we discussed the idea of storytelling and how you can efficiently utilize it in teaching. We also discussed how videos can aid the learning of students, whether those videos include stories or just learning material.

Topics

The main topics we discussed were the power of storytelling and the benefits of using videos as a medium for teaching.

We discussed how storytelling is an encompassing aspect of our humanity. We love to tell stories and our brains react to storytelling in a way that mimics how we would react had we actually been part of the story. Research also shows that storytelling is better at making people remember learned lessons than most other teaching methods.

We also discussed the power of video. We were shown how video can be used to better enhance and supplement teaching, and how proper utilization of video can allow students to better engage with the content offered and understand it in a much more concrete manner. While videos are resource intensive, they make up for that with the reward gained from using them, as well as their re-usability.

Discussion

Storytelling is definitely an important thing for me. I write as a hobby, so learning as much as I can about telling powerful, relatable stories is very useful for me. One important learning moment that I experienced when I was in high school was one of my teachers telling us about his experiences with living abroad. He discussed all of the different things he struggled with and how he was able to conquer them, and the way that he opened up and made himself vulnerable definitely made the story memorable for me. I had no idea then that I would be travelling to study abroad myself, so his story stuck with me and helped me through a lot of the challenges I face today.

I also enjoyed using Twine. The UI may be a bit annoying at times, but I can see its uses and how helpful it can be. I feel that a branched narrative like Twine can provide the opportunity for students to truly engage with the content. By allowing them to make their own decisions and reach their own conclusions, you’re putting them in the shoes of the protagonist, allowing their decisions to matter, which ultimately solidifies whatever learning experience you want to impart to them because it would be like they experienced it themselves. I have seen branched narratives used in video games and books, and they always engage me because I like seeing what sort of consequences my actions will have and what conclusions I will reach based on my decisions.

Twine

As mentioned above, Twine was a very interesting program to use. I definitely enjoyed using it and can see myself getting better at it and using it more and more down the line.

This is the link to the game I created using it: https://qjk7vsv4.play.borogove.io/

And this is a screenshot of the tree of choices you can make in the game:

Conclusion

The main thing that I love about this class is the variety of software I get to use in every module. I would have never thought to utilize twine, but now I can see myself using it for plotting out plot points for some of my writing. I definitely enjoyed this module, and I hope you enjoyed reading my blog post. Stay safe, and see you in the next one!

Module 2 Reflection

Introduction

In Module 2 of EDCI 337, titled “Design Principles for Effective and Accessible Multimedia”, we discussed the idea of accessibility when it comes to multimedia design, and how proactive accessible design benefits everybody, not just those with a disability.

Topics

The main topics we discussed were the idea of how to make your posts more accessible and how to design for a wider audience.

Designing for accessibility means that you provide means for the content you create to be accessed by a variety of people, regardless of their physical or mental disabilities, and by utilizing that concept, you are able to build your platform and the content generated by it from the ground up with the principles of inclusivity, which allows you to reach a much larger audience.

In order to achieve this, you need to think about the edge cases. How could I make my posts more readable for people who use Text-to-Speech/Screen Readers? How could I make my designs look nicer for those who are colour blind? How could I add more customization features that would benefit people and give them more autonomy? All of these are questions you can and should ask yourself while designing for accessibility. With questions like these in mind, you can envelope everybody by constantly thinking about the edge cases.

Discussion

This module was definitely interesting to me. I had never thought about accessibility when making my designs or blog posts, so learning about them definitely opened my eyes to a lot of the mistakes I was making before. This was highlighted by the WAVE accessibility report, which showed me how a lot of the default colour choices that came with the blog made it harder to read. It also identified how I had forgotten to give some form of alt text for the screen cast video I had added, which I will definitely consider fixing in my future posts.

Alt Text: Image showing the “Module 1 Reflection” Blog post available on my blog on the right. On the left, the WAVE Accessibility Report scoring metric is shown with various alerts and structural, contrast, and feature errors in the blog post being highlighted.

Another interesting element that I was never exposed to before was Text-to-Speech/Screen Readers. By “never exposed to before”, I mean I was never exposed to the idea of how some people have to rely on features like this to be able to browse the internet. I also found it interesting how many Screen Readers struggle to read bold or italic text due to the nature of them being different from regular letters, and I was surprised by how we are never taught anything like this in school or university, despite the fact that designing for something like this is neither difficult nor time consuming, and keeping it in mind helps a lot of people.

Infographic

Creating the infographic definitely helped me utilize the principles of design that we learned about this module and apply them to a topic I feel does not get enough attention. I definitely found having a template easier to start with as creating something from scratch would have been overwhelming. I also found it very satisfying to properly align and match everything so that it was as pleasing to the eye as possible. I will definitely keep all of the principles we learned this module in mind, both in this course and in my career.

Alt Text: Infographic discussing Stroke Prevention

Transcript: Title is Stroke Prevention. First box contains info on how to stave off strokes. First title is regular exercise and the body says Keeping your body active and at a healthy weight will greatly reduce your risk of a stroke. For adults, doctors recommend 2 hours and 30 minutes of moderate exercise, like a brisk walk, per week. Second title is balanced diet and the body says Ensuring that you have a balanced diet with lots of fruits and vegetables, as well as eating foods low in saturated fats and cholesterol, will decrease your risk of a stroke. Third title is regular health check ups and the body says Make sure to get your blood pressure checked regularly. Having blood tests done and, if applicable, managing your diabetes are good ways to check for signs of a stroke early. The second box has the title strokes do not see age with a graphic of a 34 percent and another graphic of 10 people with 3 being highlighted and the body says Strokes can affect anybody. In 2009, 34% of people that were hospitalized for a stroke were younger than 65 years old. Third box has the title first aid for stroked with an image of the hand of a person helping another person up and an image of a telephone being held by a hand. The body says In the unfortunate case that you, or somebody you know, suffer a stroke, use the following procedure: First, Call emergency services. If you are suffering a stroke, have somebody else call them for you. Second, Make sure that the person suffering from a stroke is in a comfortable position, preferably lying down on one side with their head slightly raised, and that they are breathing. Third, Keep them warm with a blanket and don’t give them anything to eat or drink. Fourth, When the emergency operator arrives, tell them when symptoms started and what they were. The last thing in the infographic is a small box containing the link to Nour’s Bodacious Blog.

Conclusion

This has been the most eye opening module so far. I learned a lot about accessibility and feel like my designs will greatly benefit from what I have learned. By applying what I learned, I can create content that is easy to access by everyone, even those without a disability. I hope you enjoyed my blog for this module. See you in the next one!

Module 1 Reflection

Introduction

In Module 1 of EDCI 337, titled “How Do We Learn? Theories of Multimedia Learning”, we discussed the different theories behind how our brains learn and how we, as educators, could utilize the brain’s fundamental principles to engage our students and promote active learning.

Topics

The main topic we discussed was Mayer’s Cognitive Theory of Multimedia Learning, or CTML for short. CTML was founded on the principles of Cognitive Load Theory, Dual Coding Theory, and Active Processing.

CTML uses those principles to create new principles that guide educators towards creating better multimedia content that manage Intrinsic Load (how innately difficult a topic is), promote Germane Load (the load on the brain when it is processing information and relating it to previously known ideas), and remove/limit Extraneous Load (outside load on the brain that occurs due to bad content design and unnecessary information, and limits the brain’s learning abilities).

Discussion

Now, while reading through Mayer’s principles, many of them seemed quite intuitive to me, like Pretraining and Segmenting, but a few surprised me. I was mainly surprised by the Image principle because in my first year of University, I benefitted from having my Computer Science professors’ faces on the screen because it allowed me to build a mental image of them as they spoke, so I was surprised to see that research had shown that it doesn’t positively affect learning. My experience could have also been affected by the fact that it was during the lockdown due to Covid-19, so having the professors’ faces helped with the social connection that was missing during that time.

Screencast

As part of this module, we were tasked with creating a screencast of us explaining a particular topic utilizing Mayer’s CTML principles. I chose a topic I am very familiar with: Coding! Specifically, What is Code?

When creating this screencast, I wanted to focus on the principles that managed Intrinsic Load, as coding can be a challenging topic. Pretraining was my main focus, and I tried to define things simply and explain them clearly throughout the video. Signaling was also a principle I tried to follow by only having important text on the screen and emphasizing important words and their definitions, but I struggled to do that AND follow the Redundancy principle as some of the concepts I narrated had to be included as text to highlight important areas and topics.

I created this screencast while imagining my audience to be newcomers to the field of programming. I tried to explain the topics as simply and clearly as possible so that anybody that sees the video can understand the idea and maybe become interested in the subject and try to learn more. I imagined this would be post on a platform like Youtube, so I tried to keep the video short, colourful, and interesting so that it may stand out in the platform.

Conclusion

I learned a lot from this module and quite a bit of it was surprising to me, but it was all incredibly interesting! I hope you enjoyed my first attempt at a screencast and my blog for this module. See you in the next one!

Introduction

Hello Everyone!

My name is Noureldin Kamel. I am a 4th year Computer Science student with an interest in Video game programming and development.

I am interested in this course due to the wide variety of methods that multimedia content could be utilized, both in my studies and in my future career in Video games.

I am originally from Egypt and take great pride in my history and culture, with both of them being direct inspirations for a lot of my work.

Learning Pod Self Reflection

  • What is your preferred mode of remote communication?

I mainly utilize Discord for text-based communication and Zoom for video conferencing

  • What are your communication strengths?

I like to think I am very direct and to the point with my communication which removes any fog around what I mean

  • What are your communication weaknesses? Where would you like to grow?

I definitely need to work on my time management skills

  • Do you consider yourself an introvert or extrovert?

Definitely an introvert, my alone time is very precious to me

  • What time zone are you in?

I am in the Pacific Standard time zone

  • What time of day do you prefer doing academic work?

I do some of my work during the day, but I do most of my work during the afternoons and evening

  • When you are upset do you tend to share this with others or keep it to yourself?

Most of the time I share it with family and close friends, and if something is in need of ramification immediately, I would contact the person who upset me and discuss it with them

  • What do you like about group work?

It allows each person to show their strengths and truly shine in what they are good at, which is always nice to watch

  • What don’t you like about group work?

Organizing everything and finding time for all of us to be free to work on something is definitely the most difficult part

  • What else would you like your team to know?

That I look forward to working with all of them. I am sure we’ll do great work!

Conclusion

That’s it for my first blog post. I look forward to meeting my team mates and everybody else in the class. Good luck and happy learning!